In this entry we’ll cover the correct process for the Gartech Glue System start-up. The following information covers our recommended process for start-up once glue, air, and cold water are supplied and connected. We follow these guidelines during first installation, as well as after a service call, a significant upgrade, or transfer of the glue system from one flexo folder gluer to another.
Gartech Glue System Start-Up
CAUTION: Be certain all personnel are standing clear of the glue unit prior to start-up. Keep hands and loose clothing clear of moving parts and never attempt to clean the glue wheels while they are turning. As always, respect your plant’s safety guidelines.

1) Open the glue supply line valve from the Gartech Glue Reservoir. (Item No. 18 in the above layout.) This sends glue to the Gartech Glue Manifold.

2) From the control panel, start-up the Glue System motor by turning the key selector switch to READY position.

3) From the user interface, press the button to begin Upper Glue or Lower Glue for inside or outside glue application as required for the pending order or as a test cycle. Glue will flow from the Glue Manifold to the Gartech Glue Shoe.

4) Glue will appear on the patterned area of the glue wheel only, as determined by the Glue Shoe Metering settings.
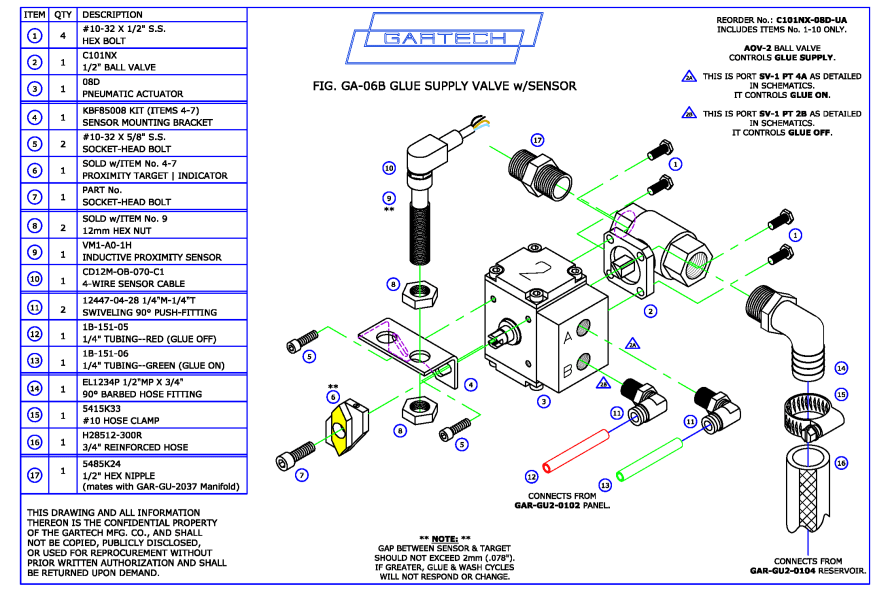
Now that we’ve completed the start-up process, the glue unit is now ready for production running. Your pattern should look like the wheel shown above. If not, double-check the metering settings, the glue formula, or adjust the volume of glue flowing from the reservoir. It never hurts to check the gap between items 6 & 9 on the below layout. This sensor lets the control panel know to open or close the ball valve that lets glue pass into the Glue Manifold.

And, finally, an overview of the complete Gartech Glue System (download or print copy):

Still have questions? Contact us through the site or by phone and we’ll help.
